Wouldn’t it be great to have your own personal assistant show you how to setup your printer for use with all the devices in your home or place of business? Look no further, because together, we will walk through each step in setting up your printer for use on your computer.
In this step-by-step guide, I will hold your hand as we walk through each step in setting up your printer for use on your computer. As an added bonus, I’ll show you how to connect it to your laptop, tablet, and even your cell phone. Then I will show you how to maintain your printer for maximum longevity.
After purchasing a printer, the expectation is that it should just work after pulling it out of the box and plugging it in. It is expected that all devices in your house or place of business should easily be able to print to this new printer without issue. Unfortunately, that is not always the case. So let’s walk through this together, and get your printer connected with your computer and other devices.
Two Ways to Set up Your Printer
There are basically two ways in which you can connect your printer with your computer. The first option is to use the traditional USB printer cable that connects your printer directly to your computer. The second option, is by connecting your printer to your local network.
Setting up a Local Printer
The first option will only allow one computer to connect to the printer, which is obviously very limiting given that only one computer can print.
When we refer to “local printer”, we mean a printer that is not connected to the network. Every printer sold today comes with a USB port that will allow you to plug a USB printer cable from the printer directly into a USB port on your computer.
If you just bought a brand new printer, the USB printer cable will be in the box. However, if you do not have a USB printer cable and you only want to Connect one computer to your printer, you will need to purchase a USB printer cable.
USB printer cable can be found pretty much anywhere, including Walmart, Best Buy, Staples, or any other major retail store that sells computer equipment. They are very inexpensive and can generally be found anywhere from 6 feet in length to 25 feet long, sometimes even longer, depending where you purchase it from.
If you need to pick one up, you can purchase a 16 foot AmazonBasics USB 2.0 Cable – A-Male to B-Male printer cable from Amazon.com for only $5.99. When it comes to USB printer cables, I would not be so concerned with the brand you purchase, as much as I would be concerned with the reviews left from those who have already purchased it. For example, with this particular printer cable, at the time of this writing, 1,844 people have given it a 4.5 star rating out of five stars.
Once you plug in the USB printer cable from the printer to your computer, after you turn the printer on your computer will automatically recognize the new printer and you should be able to print right away without the hassle of installing printer drivers or printer software.
If you purchased a new printer, the printer May come with an installation CD, but it is almost certainly unnecessary to use that installation CD unless you want to be notified when you are low on ink, or want the ability to order ink online from within the printer’s software application.
A word of caution: If you do install the printer software on your computer, keep an eye out for exactly what it is that they are installing on your computer. You may find that they are also installing bloatware or trial software that is not necessary or needed in order to print. Additionally, these printer software applications are notorious for adding programs to your start up group, meaning that they will run every time you reboot your computer and may slow down your computer. They can just as easily be launched when you need them, and they don’t have to run every time you start your computer.
Setting up Your Printer on a Network
But what are you supposed to do if you have multiple computers, laptops, and other devices such as tablets and cell phones that you want to print from? This is where the second option we referred to earlier comes into play.
There once was a time when a computer network only existed in business offices. That is no longer the case. In fact, home networks are the norm these days. A home or business network will allow multiple computers to connect to each other and print from the same printer.
In order to get your Windows computer to connect to your network printer, you must have a router set up and configured. Not to worry, as we will walk through this together.
In its simplest form, a router allows computers, laptops, smart TVs, speakers, tablets, cell phones and printers to talk to each other. You probably have a router in your home that is connected to your modem, which allows you to have Wi-Fi access to route your house. Without a router, Wi-Fi access would not be possible.
Reputable Routers
The two most important factors in producing a router are speed and signal strength. There are many brands of routers that one could use, but the following are industry leaders, and for good reason. They are reliable and offer a very strong signal which will allow devices to connect to your network throughout your home or business.
- Google WiFi
- Linksys
- Netgear
- Asus
- Samsung
- TP-Link
- D-Link
This is certainly not an exhaustive list, but these are brand names that are trusted in the industry, and you would do well to use a well known brand when choosing a router.
Just recognize that generally speaking, the more money you spend, the faster the router, and the greater signal strength you will get. Without veering too far off course, signal strength is incredibly important when purchasing a router. The reason that this is important is because the stronger the signal the further the distance that you can print from a computer, laptop, tablet or cell phone.
Now that we have shown that there are two ways to print from your computer, and have mentioned some reputable routers, (should you decide to print wirelessly), let’s take a look at how to set your printer up.
How to Install a Local Printer on Windows 7 or Windows 8.1
The following steps will show you exactly how to set up a local printer on Windows 7 or Windows 8.1. Not to worry, the steps provided are simple and straightforward.
- To begin, click the Start button, and then click Devices and Printers.
- Now click Add a Printer.
- In the Add Printer Wizard, click Add a Local Printer.
- When the Choose a Printer Port page appears, choose the Use an existing port button and be sure that the recommended printer port is selected, and click Next.
- Now the Install the Printer Driver page will appear, and when it does, select the printer manufacturer and model. Finally, click Next.
Important Note: If you find that your printer is not listed, click Windows Update, to see if Windows will find additional drivers for you.
If the driver is not available and you have the installation CD, click Have Disk, and then navigate to the location of the driver. From there you will need to complete the additional steps in the wizard, and when you have completed all of the steps, click Finish.
25 Basic Computer Tips for Windows!
Windows Simplified for the Everyday User
Download Your Copy Today!How to Install a Local Printer on Windows 10
Windows 10 has made it very easy to set up a local printer. In almost every case, all you have to connect the printer with the computer using a USB printer cable. Should that not work, however, simply follow the steps listed below:
- Click the Start button and select Settings, then click Devices, and finally, Printers & scanners.
- Click Add a Printer or Scanner.
- Once it finds the available printers, choose the one you want to use, and click Add Device.
- If the printer that you want to install is not listed in the list of available printers, then click “The printer I that I want isn’t listed”, and follow the instructions to add it manually. No need to worry, as the Wizard will walk you through each step.
Assuming you have a Wi-Fi enabled printer, connect the printer to your PC with a USB cable to set up Wi-Fi printing. Don’t worry, we will remove it in a minute.
After you have connected the printer to your PC using a USB printer cable, install the software that came with the printer using the printer’s setup assistant to connect the printer to your Wi-Fi network. After it finishes setting up, print a test page to ensure that the printer prints.
After printing a test page it ensure that it works, disconnect the printer cable from both your printer and your PC. The printer should now be recognized as a printer you can print from on the network.
Now that the printer is recognized on the network, let’s now take a look at how to set up your wireless printer using either Windows 7 or Windows 8.1 and then I’ll show you how to get windows 10 to see your network printer.
How to Install a Network, Wireless, or Bluetooth Printer on Windows 7 or Windows 8.1
If you’re trying to add a network printer at the office, you’ll usually need the name of the printer. If you can’t find it, contact your network administrator.
- Click the Start button.
- Click Devices and Printers.
- Click Add a Printer.
- When the Add Printer Wizard appears, click Add a Network and choose either Wireless or Bluetooth printer.
- You will find a list of available printers where you will need to select the one you want to use.
- When you find the right printer, click Next. Now assuming that your printer is connected to the network, you will only find available printers on the network.
- If you are prompted to install the printer driver, simply click Install Driver.
- If you are asked to provide an administrator password, be sure to type the password to provide confirmation.
- From here, complete any additional steps found in the Wizard, and then click Finish.
How to Install a Network, Wireless, or Bluetooth Printer on Windows 10
Once you have ensured that your printer is turned on and connected to the network, Windows should find the printer easily. It does not matter if it is a Bluetooth or wireless printer, or even a printer that is plugged into another computer that is connected to the network. Regardless of how they are connected, Windows should find them, but if for some reason it is not listed follow the instructions listed below to add the printer to the network.
- Select the Start button and then click Settings, then Devices, and finally Printers & Scanners.
- Click Add a Printer or Scanner. Wait for it to find nearby printers, then choose the one you want to use, and select Add device.
If your printer isn’t in the list, click “The printer that I want isn’t listed”, and follow the instructions to add it manually. There is no need to worry, as the Wizard will walk you through each step.
How to Connect a Printer on a Mac
Apple makes it ridiculously simple to set up your printer on a Mac. They utilize what they call, “AirPrint” to connect your printer with your Mac. The great thing about AirPrint is that you do not need any additional drivers to install your printer on a Mac.
In fact, they encourage you not to install any printer driver software that came with your printer, because AirPrint boasts the ability to download the latest and greatest software drivers for your printer, should it need to do so. That is just awesome.
Fortunately, nearly every printer on the market today is AirPrint enabled, meaning that you will easily connect to your Mac. It allows you to print to an AirPrint-enabled printer over a Wi-Fi, Ethernet, or via a USB Printer cable.
If you wish to use a USB Printer cable to connect directly to printer, simply connect the printer to your Mac. MacOS not only automatically detects the current printer you have connected, but it will download any needed software drivers for it as well.
If you wish to add a Wi-Fi or network printer, you can do so if both your Mac and printer are already connected to the same Wi-Fi network, within the application you are printing from, click File, then click Print, click on the Printer pop-up menu and choose Nearby Printers or Printer & Scanner Preferences, and finally choose the printer from which you want to print from.
If your printer isn’t available, you can add it. Here how:
Assuming you have a Wi-Fi enabled printer, connect the printer to your Mac with a USB cable to set up Wi-Fi printing. Don’t worry, we will remove it in a minute.
After you have connected the printer to your Mac using a USB printer cable, install the software that came with the printer using the printer’s setup assistant to connect the printer to your Wi-Fi network. Now print a test page to the printer just to show that it works.
Once you have it all set up, you can now disconnect the printer cable from both your printer and your Mac. The printer should now be recognized as a printer you can print from on the network.
How to Print From Your iPad or iPhone
If you thought connecting a Mac computer to the network printer was easy, you’ll find it this is even easier still. Obviously there are no wires to connect to the printer, so let’s take a look at how to print to a printer on your network.
The first thing you need to do is make sure that your device, (in this case, an iPad or iPhone), is connected to the network via Wi-Fi. This can simply be done by clicking tapping SETTINGS, Wi-Fi, and then selecting the networks that you wish to connect to. When you are asked for your network username and password (in a business environment), or if just the password (home environment), simply enter them and click OK.
To print from your iPhone or iPad, simply tap on FILE (or the FILE icon), and then tap PRINT, and finally AirPrint. When the Printer Options dialog box appears, under PRINTER, click Select Printer, and is a minute or so, any and all available printers will be listed for you to choose to print from. That’s all there is to it!
How to Print From Your Android Tablet or Android Smartphone
Printing from an Android device, be it a Tablet or the latest and greatest Android Smartphone, is the same. There really is only one limitation. Does the application in question support printing? The normal apps that you would expect, such as Google Docs, Microsoft Word, Microsoft Excel, photo’s, etc., all have printing options. But there are certain applications that do not, just as Facebook.
Unfortunately, due to the fact that Android does not streamline continuity the way that Apple does, printing from an application using Android will vary from application to application. But for the most part, if you find the 3 vertical ellipti in the top right corner of the app, chances are pretty high that your ill be able to print from there. Simply tap the 3 vertical ellipti, and click SHARE & EXPORT and you will then see the PRINT option.
Similar to Windows, however, you must first set up your printer so that when you do print, it knows where to print. Let’s explore how to do that now.
How to set up your printer on your Android device.
- To begin, go to SETTINGS, and look for the SEARCH icon.
- Enter PRINTING in the serch field and hit the ENTER key.
- Tap on the PRINTING option.
- You will then be given the opportunity to turn toggle on “Default Print Services”. Toggle it to the ON position.
- You will also be given the opportunity to “Download Plugin”.
- After you click the “Download Plugin”, you will see a page displaying several different printers. Select the printer brand that you have.
- You will automatically be brought to the Play Store where you can then download the Print Service Plugin for the brand you selected.
- After Installing it, go back to the Printer Settings page, (SETTINGS > (search for the word) PRINTING > and now you will see your printer brand listed under Print Services.
- Toggle that Print Services Plugin to the ON position to enable that printing service.
Now that you have set up the printer to print to from your Android device, you can print to it from any application that supports printing.
Again, click on FILE (or the FILE icon), [or in some cases the 3 vertical ellipti at the top right of the screen], SHARE & EXPORT, PRINT, and then you will be able to choose how many copies to print, as well as the paper size. You can then print to the printer that you have already set up. It’s that simple.
How to Maintain Your Printer
Regardless of the operating system you use, printing is essential for home and business use alike. Maintaining your printer is absolutely necessary. The last thing you need, is to find that your printer won’t print because it requires maintenance before it will print anything. These occurrences always happen at the worst moment.
There are several things that you can do to maintain your printer. It does not matter if you own an inkjet or laser printer, the following tips listed below will help you maintain your printer so that it will last much longer than it would otherwise. Why replace your printer when you can simply follow a few steps to maintain your printer and keep it in good working condition.
Maintaining Your Laser Printer
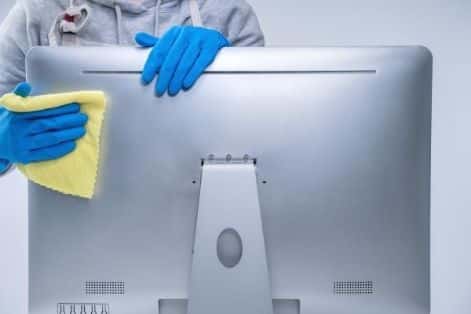
1) Clean the Exterior of Your Printer
This may sound a little silly, but understand this: The enemy of a laser printer is dust. If a speck of dust finds it’s way to the printer drum on your laser printer, every page you print will have that same speck of dust on your printout. This is why it is important to keep your laser printer clean and dust free, and it all starts on the outside of your printer.
2) Brush and Vacuum Inside Your Printer
After you have unplugged your laser printer, remove all of the the paper trays. You will need to find a brush, (an unused large makeup brush works great), to gently brush away all toner and dust out of the interior of your laser printer. You will also want to use a toner vacuum, something you could buy at your local office supply store. If you have a laser printer in your home, you could try using the vacuum hose to your vacuum cleaner, just be sure that you keep a distance of at least an 8” between the end of the hose and any part of your laser printer.
3) Maintain Your Hardware
I know that it is tempting to print every last page you possibly can before replacing the toner cartridge. After all, those toner cartridges are expensive! Just remember, that if you print out every last page, you won’t get the quality printouts that you paid for. If you find that your laser printer prints “shiny” prints, it may need new rollers, and if you find that your printouts show scratches or marks, you may need to replace “fuser assemblies”. More often than not, your printer will tell you what needs to be replaced (or addressed). You just need to listen and take the counsel of your printer. In the meantime, you can proactively feed a transparency sheet through the paper tray a few times (without printing anything on it), to clean the parts you can’t reach.
Maintaining Your Inkjet Printer
1) Clean the Print Head
This is probably the most important thing that you can do for your inkjet printer. You should do this regularly, (once a month for the life of the printer). Put it on your calendar and stick to it. It will save you money in the long run. You simply remove each cartridge and use warm water on an old T-shirt (and don’t use wipes or anything alcohol based). When you are finished wiping it clean, give it plenty of time to dry before putting it back into your printer.
2) Clean the Outside of the Printer
As with the laser printer, you want to wipe down the printer to free it from any dust. No need to go crazy here, just be thorough.
3) Clean the Inside of the Printer
You can use a can compressed air, (remember, there is no need to shake a can of compressed air), to blow out any dust lying around. You can wet the tips of a Q-tip to remove any junk residue.
3) Turn The Printer Off
If you are not going to be printing for a while, (days), turn the printer off. One of the biggest enemies of electronics is heat. If you leave the printer on, you generate heat, and that heat can cause your printer cartridge to dry and and heat can even clog the printer head.
4) Don’t Skimp On Ink Cartridges
Admittedly, ink cartridges can be expensive, and depending on how often you print, you may need to replace them fairly often. You may even be tempted to buy “inexpensive” (aka., cheap), cartridges online from China or from your local flea market. If you buy ink that was not designed for the printer in question, you take a great risk, as those ink cartridges could clog the jets in your printer and cause blotchy or faded printouts
5) Be Careful What You Touch
When you replace a printer ink cartridge, make certain that you do not touch the bottom of the ink cartridge itself, as this will affect the quality of the print.
6) Replace Your Ink Before It Runs Out
Again, because of the expense of cartridges, it is tempting to not pay attention to the warnings offered by your printer to replace the ink cartridge. If you print without sufficient ink, you are in effect, abusing the printer head which will lead to a shorter printer life.
7) Print Something on a Regular Basis
Stop thinking about how much each color printout will cost you, (a whopping .12 cents?). More damage can be done to your printer by simply not using it. If it sits for extended periods of time, your cartridges will dry up. So print something, just to keep the ink flowing. Doing this will go a long way in helping maintain a long printer life. At a minimum, print a full color test page at least once every 10 days just to make sure that your printer cartridge(s) do not dry up.
Conclusion
Though we live in an era where digital text is increasingly becoming the norm, we still need printers to meet our printing needs. Whether you choose a laser printer or an inkjet printer, today you can print from your Desktop computer, laptop, tablet, and even from your cell phone. If you take care of your printer, it will last you for years to come.
Related Questions
Where Is The Best Place To Buy A Printer?
Printers can be found everywhere, such as BestBuy, MicroCenter, Staples, and others. However, more importantly, ensure that you purchase a brand name printer, regardless of whether or not you buy an inkjet printer or a laser printer. When purchasing online, be sure to buy from reputable sources.
When Buying A Printer, Should I Buy The Extended Warranty?
If you purchase an extended warranty through a company like, BestBuy, they yes, it is highly recommended that you purchase an extended warranty. Things can break or wear out unexpectedly, and it’s very convenient to walk into the store and have them replace one from the shelf.
What Is The Expected Lifespan Of A Printer?
Generally speaking, inkjet printers have a minimum lifespan of 3 years, and laser printers have a lifespan of at least 5 or more. The better you care for your printer, the longer life you can expect out of it.

Tim Chesonis
Tim has been helping people with computers needs for several years, and he loves to help people succeed. He brings a wealth of wisdom and insight from an entrepreneur's perspective and enjoys freelance writing. In fact, when he's not writing an article, you might find him binge-watching Suits or formatting his computer . . . again, just for fun. To learn more about Tim, click here.25 Basic Computer Tips for Windows!
Windows Simplified for the Everyday User
Download Your Copy Today!